T-shirt à assemblage aimanté - SeWith
T-shirt en deux parties assemblées avec des aimants pour un enfilage facilité.
Statut du projet
Concept
License
Creative Commons Attribution CC-by-nc-sa-3.0 France
Inspiration
Fichiers source
Machines
Lien
[ ]
Description du projet
T-shirt en deux parties assemblées avec des aimants pour un enfilage facilité.
Brief initial
Un vêtement pour le haut du corps qui garantit confort et stimulation minimale : un vêtement conçu pour s'habiller et se déshabiller sans effort, adapté aux personnes hypersensibles afin de réduire la stimulation sensorielle excessive. Il met l'accent sur le confort grâce à une construction sans coutures ou à coutures plates et à l'utilisation de tissus doux, naturels, respirants et dotés de propriétés thermorégulatrices. Le col et les manches sont larges et souples, ce qui garantit une grande liberté de mouvement et un confort tout au long de la journée.
Inspirations
 Propositions issues d'une présentation de Linda Zamboni

- Drawing by Alex from the previous SeWith workshop*
- Short description of the prototype
- Description of the concept from the previous workshop
- Short description of the prototype
“A seamless top crafted from soft, breathable bamboo fabric known for its thermoregulating and hypoallergenic properties. It features an extra-wide collar and sleeves that opens and closes gently with hidden magnets, eliminating the need for zippers or buttons - for reducing sensory discomfort. Ideal for daily wear, it also includes discreet pockets to hold stress-relief object. ”
- Description of the new prototype :
- Making the top
- Machines and materials
- computer - laser cutter - sewing machine - cotton jersey - little magnets
- The project instructions, steps by steps
- Making some tiny prototypes to test somes shapes and combinations
After going through all the materials produced during the previous SeWith Workshop, we started by making some new tiny prototypes to test some shapes and combinations for the top. First we made a paper prototype for the front and the back of the t-shirt. Then we made a new one in textile and actually sew it.

- Drawing the pattern of the top
To help us build the pattern, we started from [a free shirt pattern we found in lekala.co](https://www.lekala.co/catalog/free/men/pattern/6056#model). We took some measurements on a model close to Alex's size and used the website to export the shirt pattern at the right measures. After downloading the shirt pattern in PDF, we opened it in Rhino (it also could have been Inkscape) and started to modify it to draw one wich will more resembles our prototypes. At the end we had a SVG file ready to be sent on a laser cutter !

- Laser cutting the pattern
To cut the shapes on cotton jersey we used the laser cutter. Folding the cotton in half helped us to cut the pattern in only two pieces (front and back) instead of many, despite the machine's work surface.


- The back piece going out of the laser cutter*
- Sewing the back and the front of the first iteration to do fit tests
The at the end, concept should have magnets to assemble the front and back pieces. But to do some fit tests we sewed the front and back pieces together.

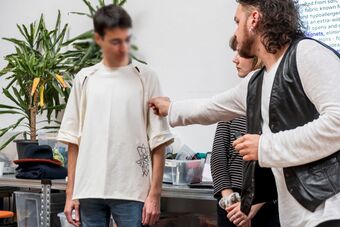
- Doing some tests on a model
To see how it fits we made some tests on a model and what sould be improve before making another iteration. At this stage, we also got feedbacks and advices from Linda.
 
- Making a second iteration and another fit test
The first version was to tight, especially under the arms. So we decided to make one size larger than the original pattern. Here is the list of the modification we made on the pattern :
- scale 2d on the old pattern - copy and paste the old collar in the new pattern - adjust the line according the collar - cut the final line of the shirt following the same longness of the first pattern
Then we used another time the laser cutter cut the new version. This second version had the shape we were looking for. Basically it was good for us, the only thing to improve was the collard but we decided to do it with the final clothe ready.
- Making a sample to test the magnet system
Then, we got tiny magnets and made a sample to test how to position and attach them :


They were placed every 7 cm on each side and 7,5 cm on the collar in order to maintain the both pieces together. In total we used 6 magnets for each part so 48 magnets in total for the whole t-shirt.
- Making the final prototype
Following the second iteration, we decided to cut the final prototype in cotton jersey. After, we traced the positions of the magnets on the fabric, and fold it in a tubular shape before sewing :


Then, we inserted the magnets in place and sewed perpendicular on each side of the magnets so they don't move.


For the only part of the t shirt with the seam - the under part of the arm - we use a korean technique which the name is bojagi to do it in a way to avoid to disturb when is dressed up.
https://www.epidastudio.com/reversible-pojagi-by-machine-option-2/
